Installation
We provide two methods to install MPicker: using Conda or using an offline package without Conda. We recommend using Conda because the offline package is quite large and contains all required libraries.
Two libraries, OptCuts and Membrane segmentation, are optional for installation. OptCuts is a third-party library for MPicker, required only if the surface needs to be flattened by the triangle-mesh method. By default, MPicker contains the library for AI-based membrane segmentation, but a version without membrane segmentation, which is smaller in size, is also provided. For full functionality of MPicker, it is recommended to install both libraries.
After installation, it is recommended to go through the Tutorial before using MPicker on personal data.
The following is the instruction to install MPicker.
Installation Guide
Install using Conda
Before the installation, Conda must be available on the system. Conda can be found at https://docs.conda.io/projects/miniconda/en/latest/.
- Download
MPicker_code_vxxx.tar.gz. (xxx is the version number) - Uncompress it into an empty folder. Let's call it
MPicker_Root/. Replace it with the actual path where MPicker will be installed.mkdir MPicker_root tar -zxvf MPicker_code_vxxx.tar.gz -C MPicker_Root - Edit the
env.ymlfile in the folderMPicker_Root/mpicker_gui:- Change "
name: mpickerxxx" (xxx is the version number, like mpicker1.2) to the preferred environment name. - Modify "
cudatoolkit=11.0" to another version if the GPU driver doesn't support it (e.g., =10.1 or =9.2). - The library versions don't have to match exactly as in the yml file. The versions provided are just one workable combinations that has been tested. However,
scipy>=1.7,yacs>=0.1.8, andpyqt=5must be satisfied.open3d=0.9.0is chosen for compatibility with older systems, but newer versions are allowed if the machine supports it.
- Change "
- Create the Conda environment from this file (may take 10 minutes or more):
conda env create -f MPicker_Root/mpicker_gui/env.yml - Finally, activate the environment with:
conda activate mpickerxxx
Install using the offline package
The offline package is generated using conda-pack on CentOS7, but it should work for other Linux systems. Conda must be used if the system is not Linux.
- Download
MPicker_environment_vxxx.tar.gzandMPicker_code_vxxx.tar.gz. - Uncompress them into two different empty folders. Let's call them
MPicker_RootandMPicker_Root_Env. Replace them with the real paths where MPicker will be installed.mkdir MPicker_Root tar -zxvf MPicker_code_vxxx.tar.gz -C MPicker_Root mkdir MPicker_Root_Env tar -zxvf MPicker_environment_vxxx.tar.gz -C MPicker_Root_Env - Unpack the Conda environment (only need to do this once):
source MPicker_Root_Env/bin/activate
conda-unpack
source MPicker_Root_Env/bin/deactivate
After installation, activate the environment using:
source MPicker_Root_Env/bin/activate
and deactivate it using:
source MPicker_Root_Env/bin/deactivate
Install without Class2D and Membrane Segmentation
This version doesn't include PyTorch, so 2D classification and AI-based automatic membrane segmentation can not work, but it has a smaller installation size.
- Replace
MPicker_code_vxxx.tar.gzwithMPicker_code_noseg_vxxx.tar.gzin the above installation instructions. The latter lacks the foldermemseg_v3(includes a pretrained model about 70M). Set up the conda environment byenv_simple.ymlrather thanenv.yml. - Replace
MPicker_environment_vxxx.tar.gzwithMPicker_environment_noseg_vxxx.tar.gzin the above installation instructions if setting up the environment without Conda.
Install OptCuts
The software OptCuts needs to be installed and added to the PATH if the surface needs to be flattened by triangle mesh (see Advanced Tutorial). Some modifications were made in its main.cpp for better performance, so just download the package from the page Download (here).
To install it, CMake and a C++ compiler are required. Then:
tar -zxvf OptCuts_MPicker.tar.gz
cd OptCuts_MPicker
mkdir build
cd build
cmake ..
make -j 4  # OR cmake --build .
# ONLY for Windows users: copy the file stb_image/libigl_stb_image.dll into bin/
Check if the software was installed successfully by:
./bin/OptCuts_bin 100 ../bunny.obj 0.999 1 0 4.1 1 0
# change 100 to 0 to show the process (start it by pressing "/")
Assume the current path is /your/path/OptCuts_MPicker/build, add OptCuts to the path by adding this line to the .bashrc file:
export PATH=/your/path/OptCuts_MPicker/build/bin:$PATH
Update from the Old Environment
If the old MPicker environment (v1.0) is already installed, just install three new libraries by:
conda install igl -c conda-forge # or python -m pip install libigl
conda install opt_einsum
conda install cython
For the current version 1.3, opt_einsum is only required by Mpicker_class2d.py (see 2D Classification), the igl is only required by Mpicker_meshparam.py (see Advanced Tutorial), and the cython is only used to speed up Mpicker_autoextract.py (see Programs List).
Start Guide
After installation, verify the installation by running MPicker as follows:
First, activate the Python environment. Verify the Python environment using:
which python
Expect a path like:
path_to/miniconda/envs/mpickerxxx/bin/python # if using miniconda
# OR
MPicker_Root_Env/bin/python # if using offline package
Run the following command to open MPicker:
python MPicker_Root/mpicker_gui/Mpicker_gui.py
Alternatively, add MPicker_Root/mpicker_gui to the $PATH and open MPicker with:
Mpicker_gui.py &
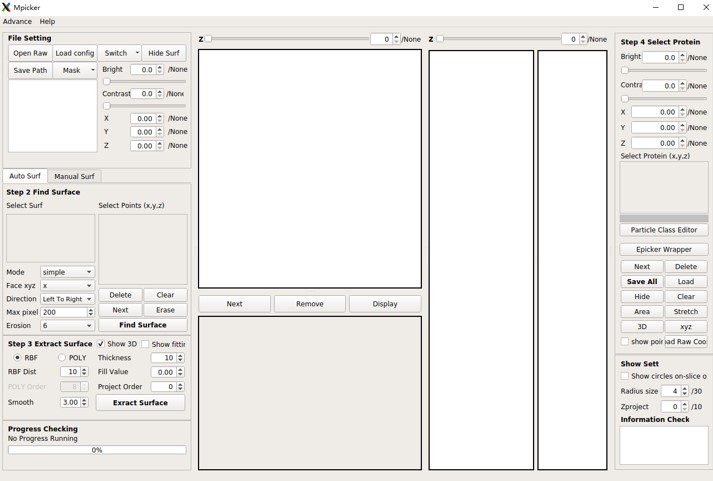
Then the following GUI will appear:
Command Start
MPicker supports these parameters input from the command line:
--raw # Path of raw tomogram map
--mask # Path of mask tomogram map
--out # Existing path to save all the result files
--config # Path of config file (config file for reloading all the process history)
Example: (Open a new GUI)
Mpicker_gui.py --raw tomogram.mrc --mask segmentation.mrc --out ./
Example: (Reload an existing job)
Mpicker_gui.py --config ./tomogram.config
Troubleshooting
- For Linux users: If the shell is not bash (e.g., csh), switching to bash may resolve environment setup issues. Check the shell using:
echo $0 bash # if the result above is not "bash" - If directly executing .py files fails, try running
bash_wrapper/mpicker.sh. AddMPicker_Root/bash_wrapperto the PATH, activate the environment, and then run MPicker using:mpicker.sh - To run MPicker without having to activate the environment first, modify
PYTHON="$(which python)"inbash_wrapper/mpicker.shtoPYTHON=/absolute/path_of/python. Then directly start MPicker bympicker.sh. This can also be tried if the system fails to locate the right Python when runningMPicker_gui.py. The absolute path of python is the result ofwhich pythonafter activating the environment, as discussed in Start Guide. - In some cases,
conda env create -fmay be very slow (cost more than half an hour in solving the environment). Updating conda to the latest version may solve the problem. Alternatively, try installingMamba(byconda install mamba -n base -c conda-forge) and replaceconda env create -fwithmamba env create -f. - If MPicker raises errors during membrane segmentation, check if it is a problem with PyTorch first. For example, try running
python -c "import torch;a=torch.tensor([1,2,3],device=0);print(a+1)"and see if it raises errors.