Tutorial
version: V1.2.3
Overview
HELIS integrates several tools to assist in analyzing helical structures in Cryo-ET data. With this software, you can pick filaments from a given tomogram, obtain their cylindrical projections, determine the corresponding helical parameters, and perform single filament sub-tomogram averaging (SF-STA).
Load Data
Step 0: Get the tutorial dataset
In this tutorial, we will use the tomogram provided in EMD-15627. Please download and unzip the dataset before proceeding.
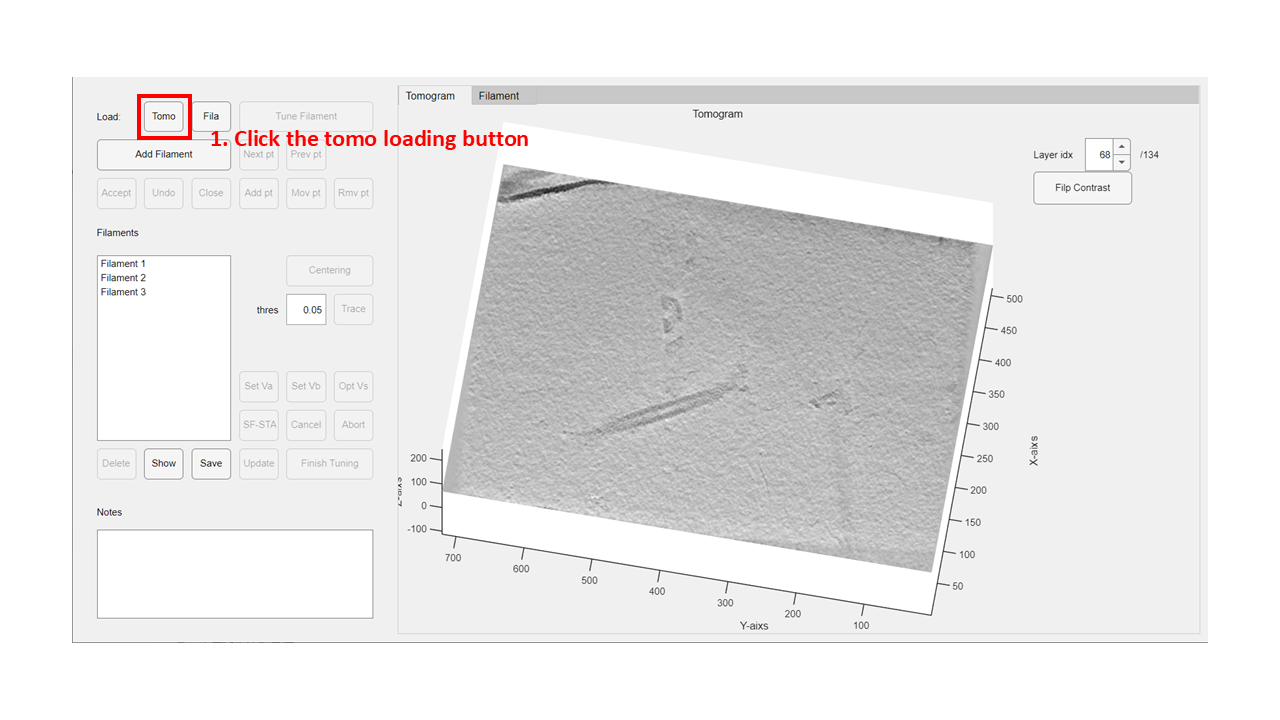
Step 1: Load Tomogram data
Click the Tomo button at the top-left of the GUI. In the pop-up dialog, select the downloaded tomogram file. After loading, the GUI will look like this:
Pick Filament
Step 1: Scan the tomogram
Use the up and down arrows of the Layer idx control or edit its value directly to navigate through the tomogram layers. Move to the 41st layer for this tutorial.
Step 2: Pick the filament manually
In the 41st layer, we can find a tube with a sharp turn. To avoid issues at the turning point, use only the upper half of the tube.
- Click the
Add Filamentbutton to enter filament-picking mode. - Click three points along the target tube (as shown below).
- Click the
Acceptbutton to save the selected points as a filament.
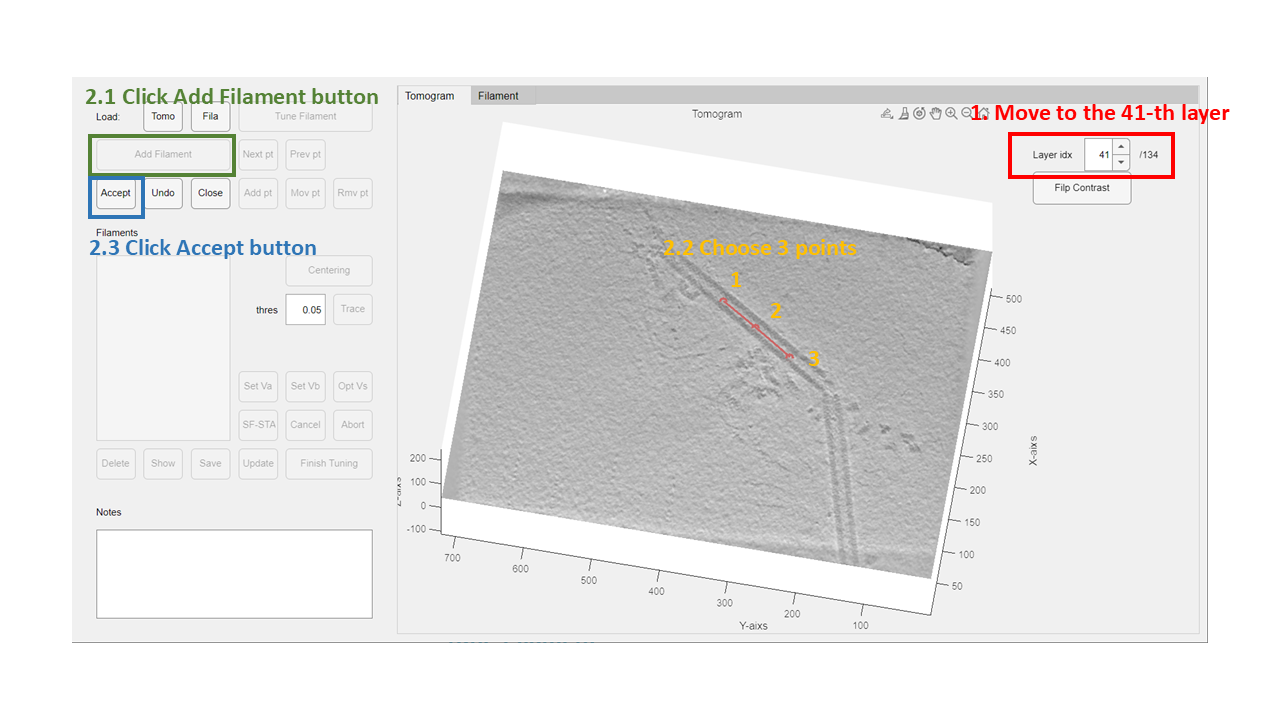
Step 3: Check the filament
After successfully adding a new filament, an item named Filament 1 will appear in the Filaments list box. Click this item to display a blue line representing the filament in the tomogram view.
Tune Filament
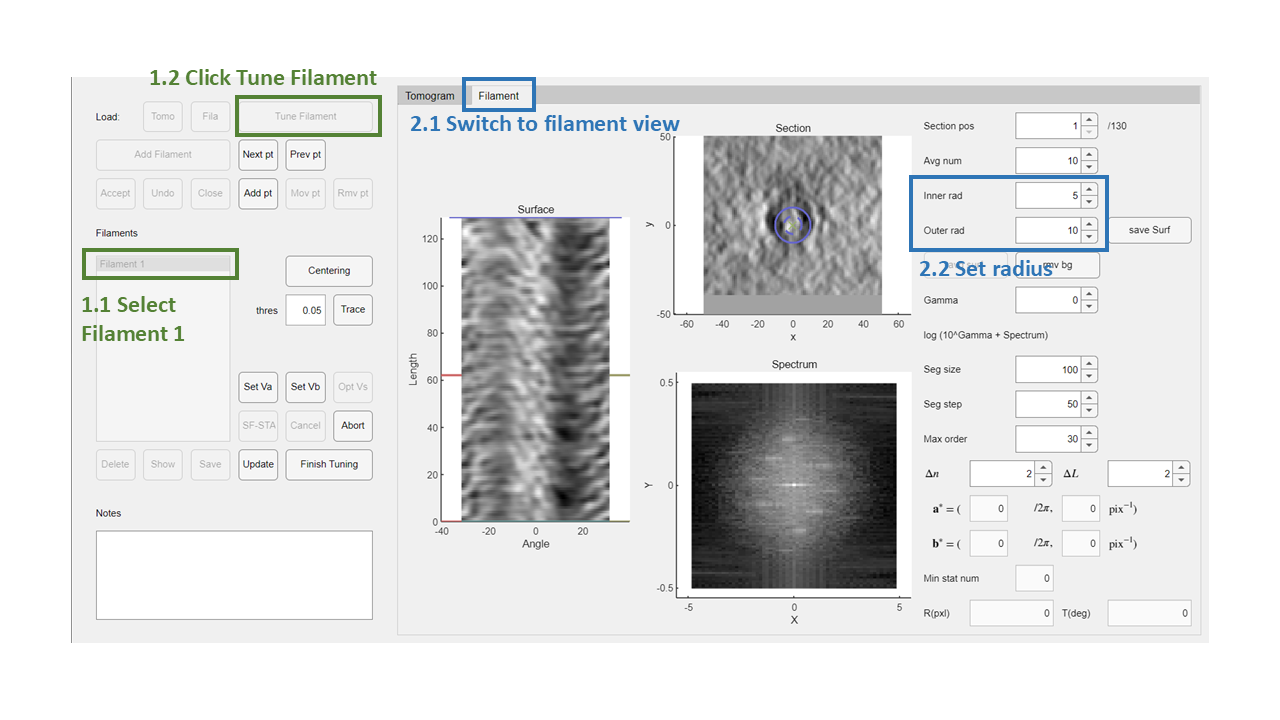
Step 1: Enter Filament Tuning Mode
With Filament 1 selected, the Tune Filament button will become active. Click it to begin tuning the filament.
Step 2: Switch to Filament View
Switch to the Filament tab. You will see three views: the cylindrical projection, filament sections, and the spectrum.
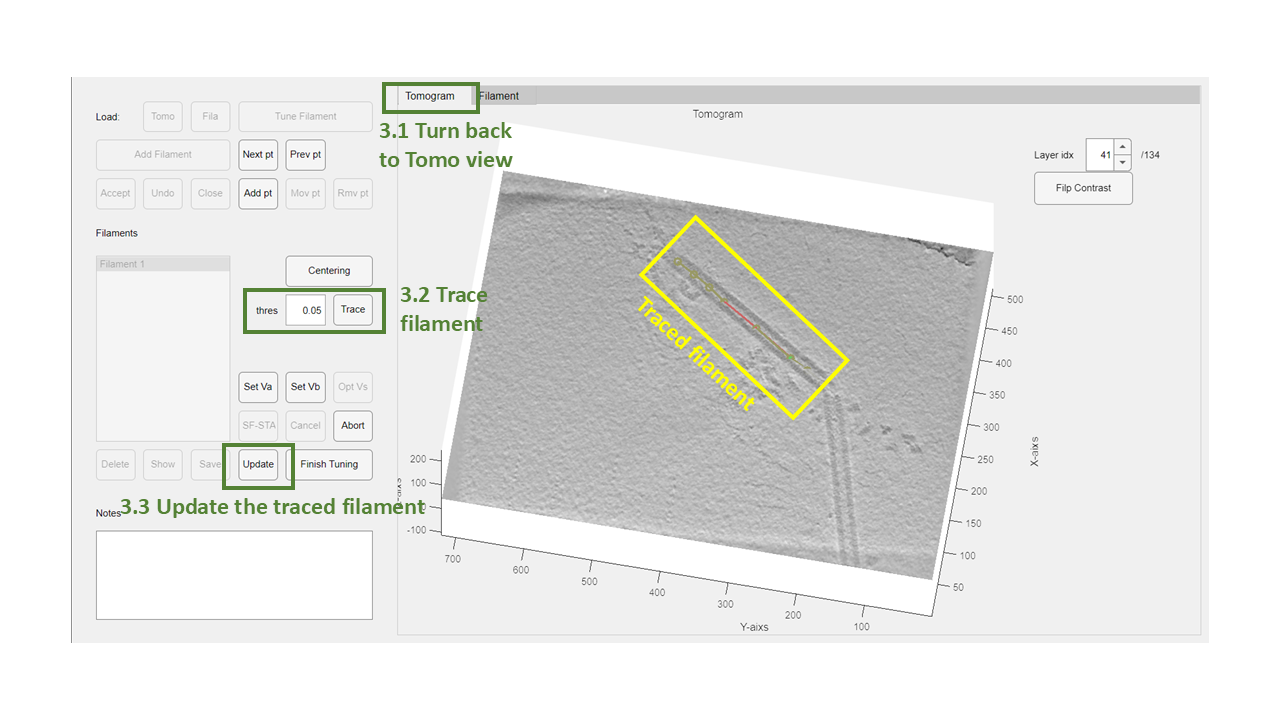
Step 3: Trace Full Filament
- Set the
thresvalue to 0.05 (slightly higher than the estimated value for more conservative tracing). - Click the
Tracebutton to automatically extend the filament in both directions.
Scan through the tomogram to verify that the tracing aligns with the real tube. If some points are misaligned:
- Use the
Next PtorPrev Ptbuttons to select the problematic points. - Click the
Rmv Ptbutton to remove them. - Click the
Updatebutton to save the tracing results.
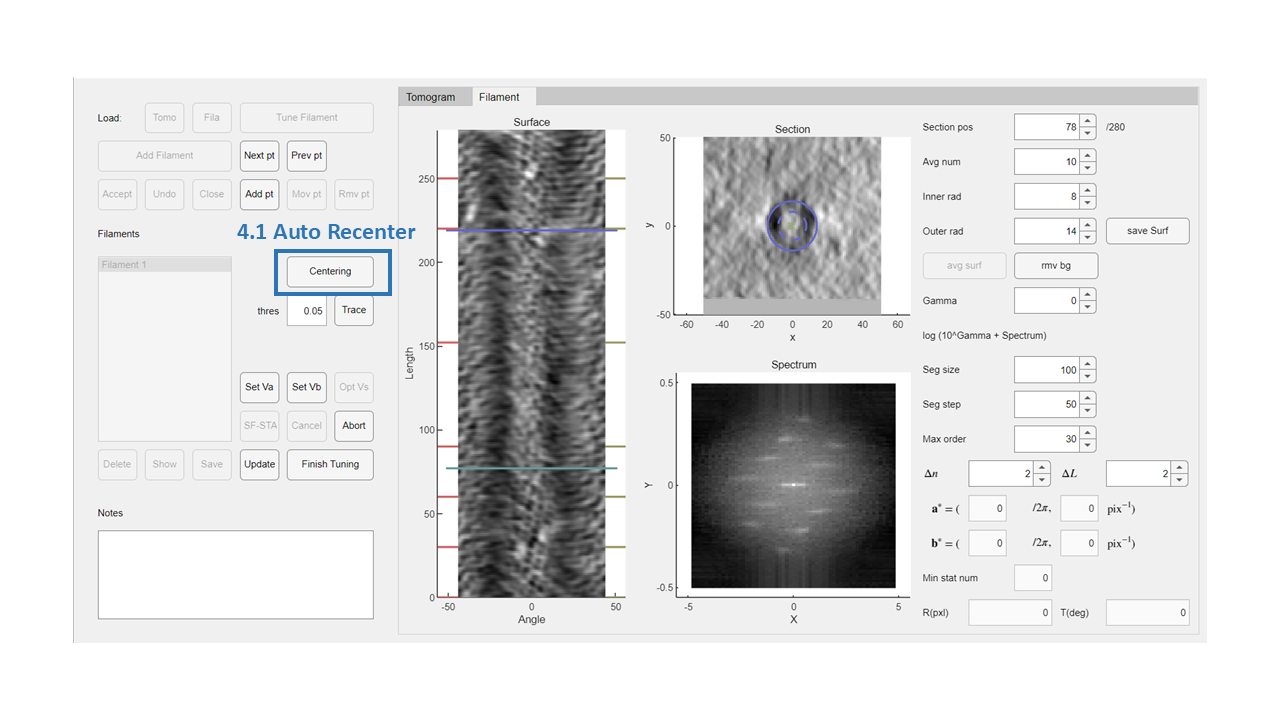
Step 4: Auto recenter
- Click the
Auto Cenbutton to automatically recenter the filament. - Click the
Updatebutton to save the recentering results.
These steps can be repeated as needed.
Step 5: Final Adjustment
For fine-tuning:
- Switch to the
Filamenttab. - Use the
Next PtandPrev Ptbuttons to navigate sample points. The filament section figure will help verify if the sample points are centered. - If a point is off-center, click the
Mov Ptbutton and select the correct position in the filament section view.
Once all points are centralized, click the Update button to re-unroll the filament for further analysis. The final GUI should resemble this:
In this view, the cylindrical projection is uniform along the z-axis, and the tubes in the filament section view are centered.
Step 6: Save Filament Information
- Click the
Finish Tuningbutton to exit tuning mode. - Click the
Savebutton to save the filament information file for future use.
Determine Helical Parameters
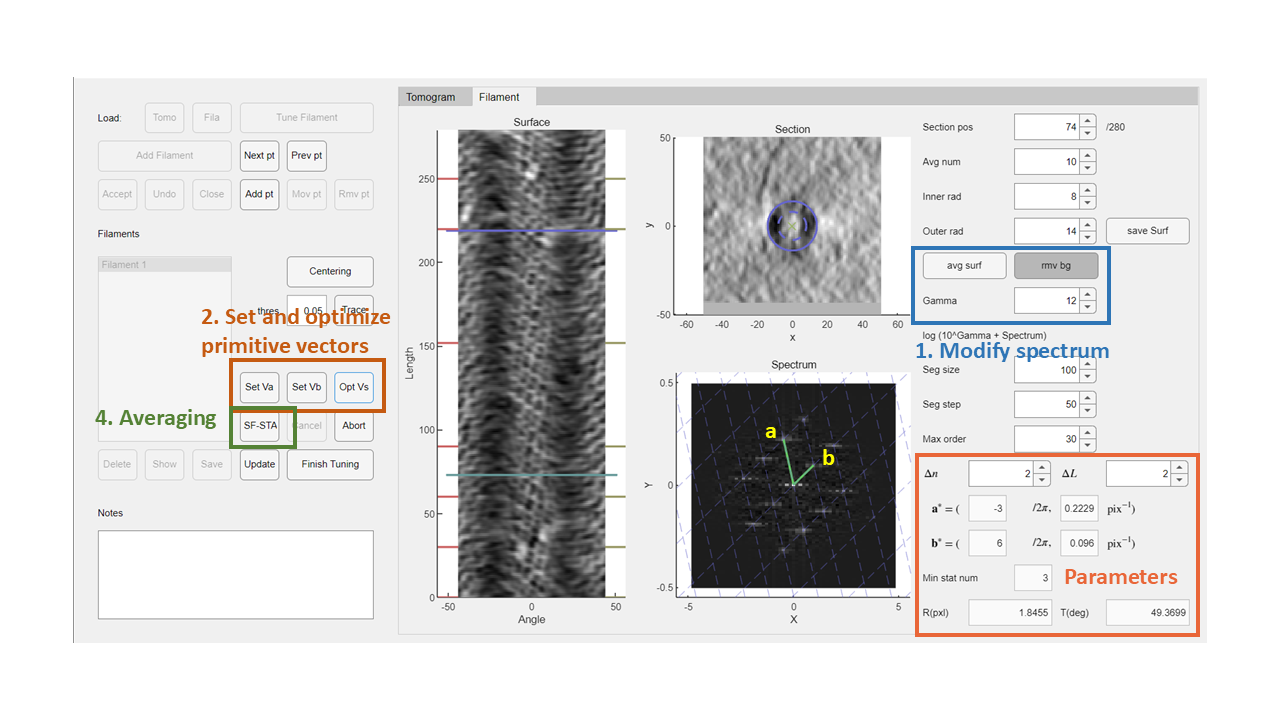
Step 1: Spectrum Modification
If you exited tuning mode earlier, click the Tune Filament button to re-enter.
- Set the
Gammavalue to 12 to suppress noise and highlight diffraction points in the spectrum. - Click the
Rmv Bgbutton to remove the spectrum background.
The modified spectrum will appear as follows:
Step 2: Manually Set Reciprocal Primitive Vectors
- Click
Set Vaand then select a diffraction point in the spectrum. - Click
Set Vband select another diffraction point.
Ensure that the grid formed by these vectors covers all diffraction points.
Step 3: Automatic Optimization
Click the Opt Vs button to optimize the manually selected vectors. The reciprocal vector coordinates and corresponding helical parameters will be displayed in the bottom-right section of the GUI.
Step 4: Symmetrical Averaging
- Click the
Avg Surfbutton to average the cylindrical projection based on the helical symmetry. - Click the
SF-STAbutton to segment and align the helical structure using the helical parameters.